


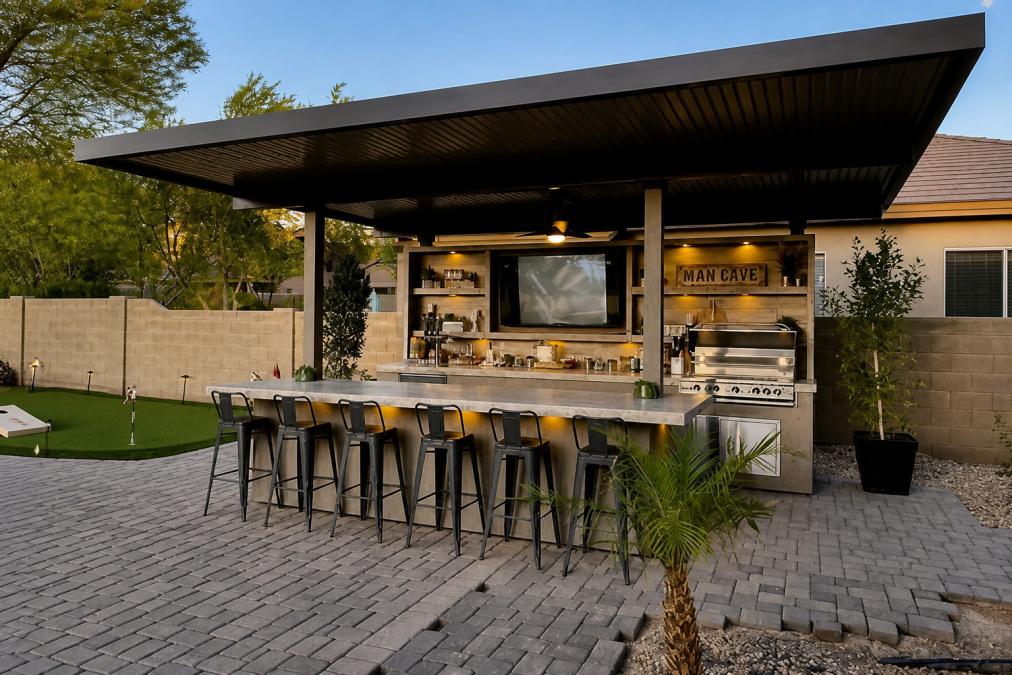
How to Plan Outdoor Kitchen Space: A 2026 Guide
Table of Contents
- Defining Your Outdoor Kitchen Zones
- Outdoor Kitchen Zoning Best Practices
- Selecting the Right Layout for Your Space
- Outdoor Kitchen Appliance Requirements and Selection
- Outdoor Kitchen Utility Planning Essentials
- Choosing Durable Materials and Countertops
- Lighting, Drainage, and Climate Considerations
- Budgeting, Permits, and Project Timeline
Last Updated: August 21, 2026
Defining Your Outdoor Kitchen Zones
Planning outdoor kitchen space starts with understanding how you'll actually use the area. Most homeowners treat their outdoor kitchen as a single zone when it should function as multiple distinct work areas. Your outdoor kitchen needs the same thoughtful zoning as your indoor kitchen.
Identify three primary zones: the cooking zone (grill and heat-producing appliances), the prep zone (cleaning, chopping, and assembly), and the serving area (where guests gather and eat). Each zone should have enough space to function independently without constant interference.
A well-designed layout means you can grill steaks while a guest chops vegetables nearby, and another person can grab drinks without disrupting either activity. This is the difference between a cramped, frustrating outdoor kitchen and one that actually works.
Outdoor Kitchen Zoning Best Practices
The work triangle concept, borrowed from indoor kitchen design, remains one of the most effective approaches for planning outdoor kitchen spaces. Your three main work zones should form a triangle: the grill (heat source), the prep counter (cold zone), and the serving or beverage area. The distances between these points should be manageable, typically 4 to 9 feet apart.
Position your grill at least 10 feet from doors and windows to avoid smoke and heat issues inside your home. This distance also improves traffic flow and prevents people from walking through your cooking zone.
Consider sun exposure and prevailing winds when planning your outdoor kitchen. Intense afternoon sun requires shade structures over your prep and serving areas. Wind patterns affect both smoke direction from your grill and comfort at your prep counter. A few days of observation will tell you where wind typically blows and which spots stay cooler in summer.
The National Association of Home Builders' outdoor living guidelines emphasize that proper zoning reduces accidents and improves usability.
Selecting the Right Layout for Your Space
Your outdoor kitchen layout depends on available space, your yard's shape, and how you entertain. The three most common configurations are L-shaped, U-shaped, and island layouts.
L-Shape, U-Shape, and Island Configurations
An L-shaped layout fits well in rectangular yards or along two perpendicular edges of your patio. One arm holds your grill and cooking appliances; the other has your prep counter and storage. This configuration maximizes counter space while keeping the footprint compact, making it ideal for moderate yard space. The open side allows easy access and good traffic flow.
A U-shaped layout wraps three sides around a central cooking area, maximizing workspace and storage. However, it requires significantly more space and can feel cramped in small yards. The U-shape works best when you have a dedicated entertaining area and regularly host large groups.
Island layouts place the grill and countertops in the center of your patio, accessible from all sides. This is the most flexible design for entertaining because guests can gather around while you cook. Island configurations also look more polished and integrated into your outdoor living space. The trade-off is needing a larger, more open area to avoid awkward traffic patterns.
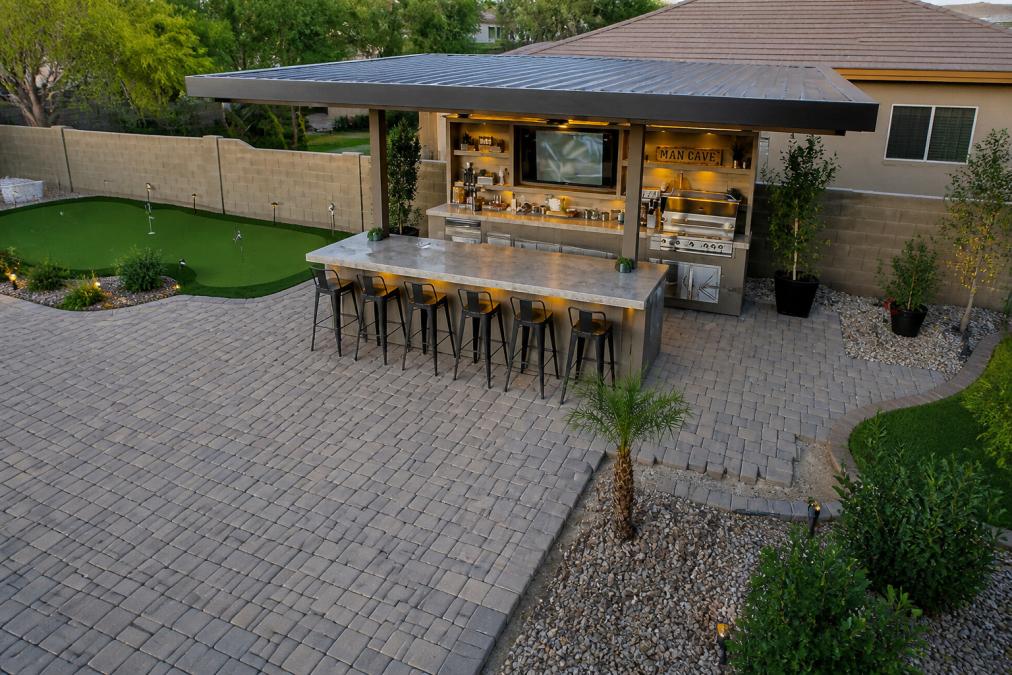
Think about how people naturally move through your yard. If your entertaining area is separate from your main patio, an island might work better. If you're working with a corner or edge, L-shaped is usually practical. U-shaped layouts suit large, open entertaining spaces.
Home Outpost Supply offers several pre-designed outdoor kitchen configurations following these proven layouts. The 5' WPPO Outdoor Kitchen with Blaze Grill features an efficient L-shaped footprint for moderate yard spaces, while the KoKoMo Outdoor Kitchen Pavilion accommodates full U-shaped or island configurations for comprehensive entertaining areas.


Outdoor Kitchen Appliance Requirements and Selection
Once you've decided on your layout, choose which appliances actually go in your outdoor kitchen. A quality grill is essential, but supporting appliances depend on how you cook and entertain.
Many homeowners add a prep sink for washing vegetables and cleaning hands. A small refrigerator or beverage cooler keeps drinks cold without indoor trips. A side burner heats sauces or cooks side dishes. Some people add a pizza oven, smoker, or rotisserie if those cooking methods matter to them.
The mistake many people make is overbuying appliances they'll rarely use. Choose appliances matching your actual cooking style and entertaining habits. If you never cook pizza, don't install a pizza oven just because it looks nice.
Stainless steel is the standard material for outdoor kitchen appliances because it resists rust and corrosion. 304-grade stainless steel is more durable in coastal or harsh climates. 430-grade is adequate for most inland areas but won't last as long in salt air.
Outdoor Kitchen Utility Planning Essentials
You need gas, water, and electricity to make your outdoor kitchen function. Planning these utilities before construction is critical; retrofitting them later is expensive and disruptive.
Gas, Water, and Electrical Hookups
Gas lines need to be buried at least 18 inches deep to protect them from damage and freezing. If your grill is more than 50 feet from your gas meter, you'll need a larger line diameter to maintain proper pressure. Gas line installation must be done by a licensed professional. Local codes vary, but most jurisdictions require permits and inspections.
Water lines also need to be buried below the frost line in your region to prevent freezing and cracking. A typical outdoor kitchen sink runs 3/4-inch water line from your main supply. You'll also need a drain line sloped away from your house to prevent water pooling. Many people add a frost-free spigot in addition to their prep sink for rinsing the patio.
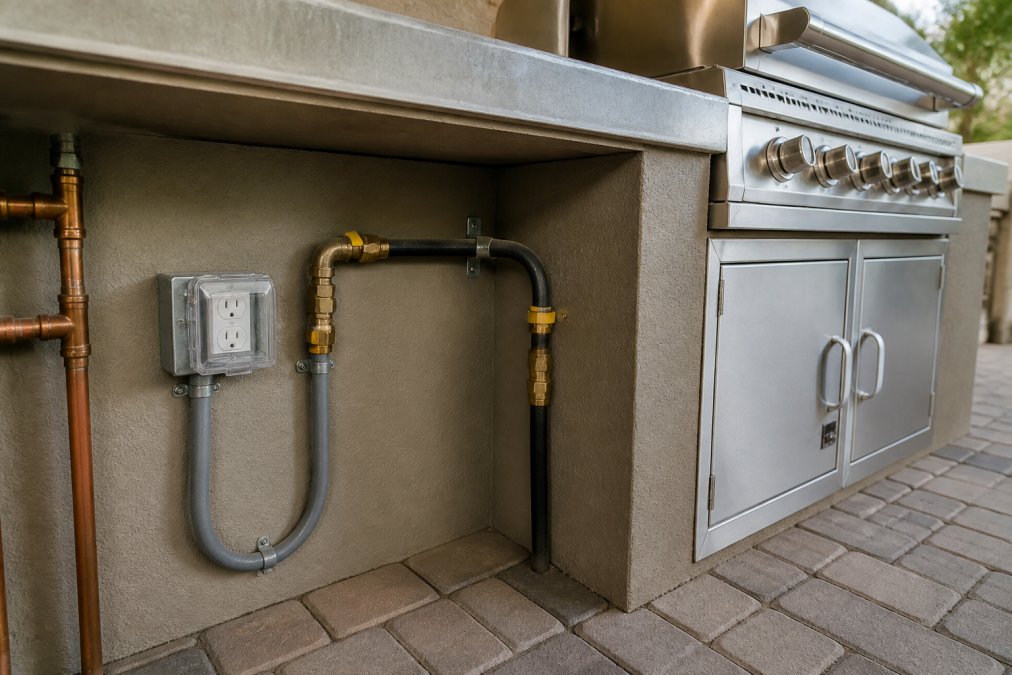
Electrical requirements depend on what appliances you're powering. A basic grill with a side burner might need just a single outlet. Adding a mini fridge, ice maker, or lighting requires multiple circuits. All outdoor electrical outlets must be GFCI-protected (ground-fault circuit interrupter) to prevent shock hazards. Outdoor circuits should be on their own breaker, separate from indoor kitchen circuits.
Buried electrical lines need to be in conduit and buried at least 12 inches deep in most jurisdictions. Above-ground wiring should run through weatherproof conduit. This work typically requires a licensed electrician and permits. Proper installation is worth the cost compared to the risk of electrical failure or safety hazards.
The National Electrical Code's outdoor electrical requirements specify that all outdoor outlets must have GFCI protection and buried lines must meet minimum depth requirements. These are safety standards that protect you and your guests.
Contact your local building department about permits and code requirements before planning your outdoor kitchen. Some jurisdictions have specific setback requirements for gas lines or restrictions on where you can bury utilities. Getting this information upfront prevents costly mistakes and ensures your project passes inspection.
Choosing Durable Materials and Countertops
Your outdoor kitchen countertops and cabinetry take a beating from weather, sun, moisture, and temperature swings. Material choice directly affects longevity and maintenance requirements.
Stone countertops like granite, limestone, and slate are popular because they look beautiful and handle temperature changes well. Granite is extremely durable and resists staining but is porous and needs sealing every 1-2 years. Slate is naturally water-resistant but can be slippery when wet. Limestone is softer and more prone to etching from acidic foods.
Concrete countertops are more affordable and customizable to any shape. They're durable but require sealing and can develop cracks if not properly installed. Stainless steel countertops are extremely durable and easy to clean, though they show fingerprints and dents. Tile countertops offer design flexibility but grout lines trap debris and require regular cleaning.
Cabinetry materials matter as much as countertops. Stainless steel cabinets are expensive but virtually indestructible and require minimal maintenance. Powder-coated aluminum or steel cabinets are more affordable and reasonably durable but can chip if damaged. Teak and other outdoor-rated woods look beautiful but require regular sealing. Avoid standard interior plywood or MDF, they'll rot within a year or two in outdoor conditions.
Lighting, Drainage, and Climate Considerations
Outdoor kitchen lighting serves two purposes: task lighting for cooking and ambient lighting for entertaining. Task lighting should be bright and focused on your grill and prep areas. Under-cabinet LED strips work well for prep counters. Overhead fixtures mounted on structures or pergolas provide general illumination. Ambient lighting like string lights or lanterns sets the mood without being too bright.
Drainage is often overlooked but essential. Your outdoor kitchen needs to shed water during rain and cleaning. Sloped countertops direct water away from appliances. Floor drains or sloped patio sections prevent water pooling. In areas with heavy rain, a small French drain system around your outdoor kitchen prevents water damage and erosion.
Climate considerations vary dramatically by region. In hot, sunny climates, shade structures like pergolas keep your prep area comfortable and protect food from direct sun. In cold climates, winterize your outdoor kitchen by draining water lines and protecting exposed pipes. Coastal areas require corrosion-resistant materials because salt air accelerates rust. Humid climates need extra attention to mold and mildew prevention through proper ventilation and drainage.
The U.S. Environmental Protection Agency's guidance on outdoor living spaces and climate resilience notes that proper drainage and material selection reduce water damage and extend the lifespan of outdoor structures in various climate zones.
Budgeting, Permits, and Project Timeline
Before planning your outdoor kitchen space, establish a realistic budget. Outdoor kitchens range from basic setups under $3,000 to luxury installations exceeding $50,000.
A modest outdoor kitchen with a basic grill, prep counter, and minimal storage might cost $5,000-$10,000 in materials and labor. A mid-range installation with quality appliances, stone countertops, and built-in storage typically runs $15,000-$30,000. High-end kitchens with premium appliances and elaborate design easily exceed $50,000.
Home Outpost Supply offers outdoor kitchen options across multiple price points. The Portals Light Outdoor Kitchen at $2,497 provides an affordable entry point. The Amber Outdoor Kitchen at $2,797 adds more functionality. The 5' WPPO Outdoor Kitchen with Blaze Grill at $4,846 delivers professional-grade quality. For luxury installations, the KoKoMo Outdoor Kitchen Pavilion at $53,225 or the KoKoMo Luxury Outdoor Kitchen BBQ Island at $149,995 represent top-tier options.

Permits are required in most jurisdictions for outdoor kitchens, especially with gas, water, or electrical work. Permit costs typically range from $100-$500. The permitting process usually takes 2-4 weeks. Plan for inspections at foundation, utility work, and final completion stages. Permits ensure your installation meets safety codes and protects your property value.
Project timeline depends on complexity. A simple modular outdoor kitchen might be ready within a week. A custom installation with utility work, concrete pads, and built-in appliances typically takes 4-8 weeks. Factor in time for permits, material delivery, and inspections. Weather delays can add 1-2 weeks.
| Phase | Timeline | Key Activities |
|---|---|---|
| Planning & Permits | 2-4 weeks | Design layout, get permits, order materials |
| Site Preparation | 1-2 weeks | Build foundation, install utilities |
| Installation | 2-4 weeks | Install appliances, countertops, cabinetry |
| Finishing | 1 week | Lighting, drainage, final touches |
Planning your outdoor kitchen space requires balancing entertaining goals, available budget, and practical considerations like utilities and climate. The difference between an outdoor kitchen that works beautifully and one that frustrates you comes down to thoughtful zoning, material choices, and proper utility planning. Home Outpost Supply provides quality outdoor kitchen solutions at every price point, backed by insured shipping and dedicated support to help you through every step of your project. Get started with Home Outpost Supply and transform your backyard into a functional, beautiful entertaining space that you'll use for years to come.
Frequently Asked Questions
What is the ideal layout for an outdoor kitchen?
The ideal layout depends on your space and workflow. L-shaped and U-shaped designs work well for most yards, creating an efficient work triangle between prep, cooking, and serving zones. Island layouts maximize usable counter space but require more square footage. The key is positioning your grill as the central cooking zone, with food prep on one side and a serving area on the other. This arrangement minimizes steps during meal preparation and improves traffic flow when entertaining.
How much space do I need for a functional outdoor kitchen?
Most functional outdoor kitchens require a minimum of 150-200 square feet, though smaller setups can work in tight spaces. A 5-foot outdoor kitchen like the WPPO model ($4,846) fits compact yards, while larger islands typically need 8-12 feet of linear space. Factor in 3-4 feet of clearance around the kitchen for movement and traffic. Measure your yard first, account for existing landscaping and patio placement, then choose a layout that fits your dimensions without feeling cramped.
Do I need a permit to build an outdoor kitchen?
Most jurisdictions require permits for outdoor kitchens, especially those with gas lines, electrical hookups, or permanent structures. Permit requirements vary by location and depend on whether you're installing a built-in grill, adding utilities, or building a pavilion. Contact your local building department before starting. Permits typically cost $50-$300 and take 1-2 weeks to approve. Getting permits upfront protects your investment and ensures your kitchen meets safety codes for gas, electrical, and drainage.
What outdoor kitchen utility planning steps should I prioritize?
Start by locating existing gas lines, water sources, and electrical panels on your property. Plan gas line extensions for your grill, water access for a sink, and GFCI-protected electrical outlets for appliances and lighting. Hire a licensed plumber and electrician to assess feasibility and costs, this typically runs $500-$2,000 depending on distance and complexity. Ensure proper drainage around the kitchen to prevent water pooling. Having utilities planned before construction prevents costly relocations and safety issues.
What materials hold up best in outdoor kitchen spaces?
Stainless steel, stone veneer, and powder-coated aluminum resist weathering and require minimal maintenance. Granite or concrete countertops handle heat and moisture well. Avoid untreated wood and standard drywall, which deteriorate quickly outdoors. Pavers or composite decking work better than wood for flooring under the kitchen. Check product durability ratings for your climate, coastal areas need corrosion-resistant materials, while freeze-thaw regions need stone that won't crack. Quality materials cost more upfront but last 15+ years versus 3-5 years for budget options.
How do I avoid the most common outdoor kitchen planning mistakes?
The biggest mistakes are underestimating counter space, forgetting about shade and lighting, and ignoring drainage. Many homeowners skip permit requirements, leading to code violations. Others place grills too close to structures or trees, creating fire hazards. Not planning for utilities upfront causes expensive rework. Avoid positioning the kitchen where prevailing winds blow smoke toward seating areas. Test your layout in person before building, mark zones with tape to ensure the work triangle flows naturally and appliances have adequate spacing.
This article was written using GrandRanker


Leave a comment
This site is protected by hCaptcha and the hCaptcha Privacy Policy and Terms of Service apply.