


Why Professional Shed Installation Matters for Your Backyard
Table of Contents
- Quick Comparison: DIY Assembly vs Professional Shed Installation
- Shed Foundation Requirements: Where Most DIY Installs Fail
- Backyard Shed Building Permits and Zoning Rules You Need to Check
- DIY vs Professional Shed Assembly: Time, Cost, and Risk
- How Professional Shed Installation Protects Your Warranty and Resale Value
- Matching Shed Size and Style to Your Backyard Layout
- What Professional Shed Installation Costs and What You Get
- Conclusion
- Frequently Asked Questions
Last Updated: September 10, 2026
Quick Comparison: DIY Assembly vs Professional Shed Installation
The case for why professional shed installation matters starts with a single number: the foundation. Most shed failures trace back to the base, not the walls. Most shed failures trace back to the base, not the walls. Many homeowners spend a weekend wrestling a kit into place only to watch the floor warp within two seasons.
Here's the honest trade-off, side by side.
| Factor | DIY Assembly | Professional Shed Installation |
|---|---|---|
| Typical timeline | 1-3 weekends | 1-2 days |
| Foundation quality | Depends on your prep | Leveled, code-aware base |
| Permit handling | You research it | Often managed for you |
| Warranty status | Can be voided by errors | Preserved |
| Resale documentation | Rarely recorded | Often documented |
Professional shed installation is the process of having a trained crew site, level, and assemble your storage structure to manufacturer and local code standards. It costs more upfront. It also sidesteps the mistakes that quietly destroy a shed from the ground up.
If you're weighing this decision, the sections below walk through foundations, permits, and the real cost of getting it wrong.
Shed Foundation Requirements: Where Most DIY Installs Fail
A shed foundation must support the full weight of the structure plus everything inside it, and it must stay level through freeze and thaw cycles. That's the requirement most homeowners underestimate. A base that's off by even a small margin puts stress on every panel and joint above it.
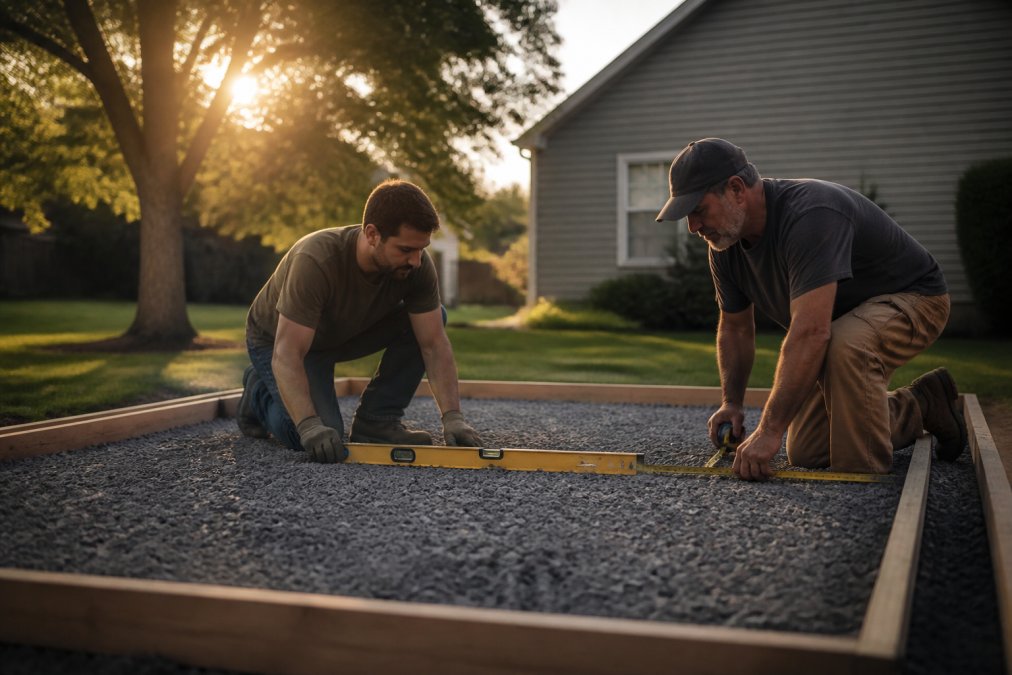
Three foundation types dominate residential builds, and each suits a different situation.
Gravel Base, Concrete Slab, or Wood Platform: What Your Shed Needs
A gravel base works well for smaller utility sheds and costs the least to install. It drains well but shifts over time if the perimeter isn't contained. A concrete slab is the most durable option and handles heavy equipment, but it requires more site preparation and a longer cure time. A wood platform suits sloped yards and sheds that may need to move later.
The right choice depends on your shed's footprint, your soil, and how long you plan to keep the structure in place.
Why Ground Leveling Decides How Long Your Shed Lasts
Ground leveling is the step that determines whether your shed lasts five years or twenty. A shed sitting on uneven ground twists slowly. Doors stop latching. Roof pitch distorts and water finds a way in. By the time you notice, the frame has already taken the damage.
Professionals check level at multiple points across the footprint, not just at the corners. That attention to the full surface is where DIY installs most often fall short.
Backyard Shed Building Permits and Zoning Rules You Need to Check
Backyard shed building permits are required in many jurisdictions once a structure crosses a certain size, and the threshold varies by location. Skipping this step can mean fines, forced removal, or a title problem when you sell. Most high-ranking guides stop at "check with your local planning office." That advice is technically true and practically useless. Here is the actual workflow.
The Three Numbers That Decide Everything
Almost every residential shed dispute comes down to three measurements. Get these before you buy a kit, not after.
- Maximum square footage for an accessory structure. Many jurisdictions exempt small sheds below a floor area threshold (commonly somewhere in the 100-200 sq ft range, though this varies widely) from a full building permit, while anything larger triggers one. A 10x12 footprint is 120 sq ft, right in the zone where the rules flip.
- Setback distance from property lines. Setbacks are measured from the property line to the nearest edge of the structure, not to the center. A common residential side-yard setback is 3-5 ft, but rear-yard and corner-lot rules often differ. A shed placed too close to a fence can violate these rules even if everything else is compliant.
- Height and roof-pitch limits. Height caps are usually measured from finished grade to the highest point of the roof, which means the foundation type you choose changes your compliance margin.
How to Read Your Own Zoning Code Without a Lawyer
Search your municipal website for the term "accessory structure" or "accessory building." That is the phrase most codes use for sheds, garages, and similar outbuildings. Look for a definitions section and a dimensional-standards table. The table usually lists setbacks, height, and lot-coverage limits in one place.
If the code is silent on a specific question, call the planning office and ask for the answer in writing, email is fine. A written response is your documentation if a neighbor complains later.
The HOA Layer Most Guides Ignore
Covenants, Conditions, and Restrictions (CC&Rs) frequently dictate shed size, color, roof material, and placement more strictly than the city does. An HOA can legally forbid a shed your municipality would permit. Before you commit to a style or footprint, run this checklist:
- Pull your CC&Rs and search for "outbuilding," "accessory structure," and "storage."
- Check whether architectural review committee (ARC) approval is required before construction, most HOAs require it, and retroactive approval is rarely granted.
- Confirm approved colors, roof pitches, and siding materials.
- Verify whether the HOA imposes its own setback buffer beyond the municipal requirement.
- Submit your ARC application with a site plan showing the footprint and distances to property lines.
Why Local Installers Already Know the Answer
A professional installer who works in your area regularly will already know the local thresholds and can flag problems before you pour a base. That local pattern-recognition, knowing which neighborhoods have aggressive HOAs, which inspectors want a site plan, which soil types need a deeper base, is a form of compliance insurance you cannot get from a national retailer's FAQ page.
DIY vs Professional Shed Assembly: Time, Cost, and Risk
DIY vs professional shed assembly comes down to how you value your weekends against the risk of a costly redo. A kit might save money on labor. It rarely saves money if the foundation fails or the permit gets rejected.
Consider what a typical DIY build actually involves: site clearing, base prep, panel assembly, roof work, and door alignment. Each step compounds the next. Get the base wrong and every subsequent step inherits the error.
Professional crews bring the right tools, the experience to spot a bad site before they start, and accountability if something goes wrong. That last point matters more than most people realize.
How Professional Shed Installation Protects Your Warranty and Resale Value
Professional shed installation protects two things homeowners rarely think about until they need them: the manufacturer's warranty and the resale value of the property. Many shed warranties require installation according to the manufacturer's specifications. A self-installed shed that fails inspection can void that coverage entirely.
On the resale side, a documented, permitted, professionally installed shed is an asset. An unpermitted structure is a liability a buyer's inspector will flag. Having paperwork that shows the shed was installed to code removes a negotiating point before it becomes one.
This is the part most guides skip. The value of professional installation isn't just a straighter shed. It's the record that the shed was done right.
Matching Shed Size and Style to Your Backyard Layout
Matching shed size to your backyard layout starts with measuring your available space, then subtracting the setbacks. Most homeowners overestimate how much room they have once property lines and clearance are accounted for.
Walk your yard with a tape measure and mark the footprint with stakes and string before you order. Seeing the actual perimeter on the ground prevents the most expensive mistake in this whole process: buying a shed that doesn't fit.
Visualizing the Footprint Before You Buy
Stakes and string work, but spray paint on grass is faster and more honest. Mark the four corners, then stand inside the rectangle and try to imagine your mower, your bikes, and your holiday bins occupying that space. Most people discover within two minutes that their planned footprint is either too generous or too tight.
Do this at the same time of day you'll actually use the shed. A footprint that looks fine at noon can sit in shadow by 4 p.m., which matters if you plan to work inside it.
Common Dimensions: 6x8, 8x10, 10x12, and Larger Footprints
Common shed dimensions run from compact 6x8 units up to 10x12 footprints and beyond, and each size serves a different storage capacity.

| Footprint | Square Footage | Best For |
|---|---|---|
| 6x8 | 48 sq ft | Hand tools, small lawn equipment |
| 8x10 | 80 sq ft | Bikes, mower, seasonal decor |
| 10x12 | 120 sq ft | Workshop space, larger equipment |
| 13x20 | 260 sq ft | Vehicles, full workshop |
For a durable option that handles weather and holds its shape, the 8x16Ft Resin Outdoor Storage Shed with Carpet offers a weatherproof resin build suited to patios and backyards. If you need serious capacity, the 13'x20' Metal Shed with Double Front Doors & Side Entry Door provides oversized double doors and a side entry for easy access.


The Vertical Storage Hack That Shrinks Your Footprint
Here is the angle most shed guides skip entirely: footprint is not the same as capacity. Two sheds with identical floor dimensions can hold wildly different amounts of stuff depending on how you use the walls and the air above your head.
Three moves let you buy a smaller, cheaper shed and still fit everything:
- Wall-mounted hooks and rails. Long-handled tools, rakes, shovels, brooms, extension poles, take up almost no floor space when hung vertically. A single 4-ft rail can hold what would otherwise consume a corner of the floor.
- Overhead loft shelving. Most sheds have 6-8 ft of interior height and use only the bottom 4 ft. A loft shelf spanning the back wall captures that dead zone for seasonal bins, coolers, and camping gear.
- Stackable, labeled bins on a shelving unit. Floor-to-ceiling shelving on one wall converts a 6x8 into something that behaves like an 8x10 for storage purposes.
Future-Proofing for Hobbies, Not Just Storage
If there is any chance the shed becomes a workshop, potting station, or home office, plan for it now. That means a dedicated circuit for power, a window or skylight for daylight, and enough headroom to stand comfortably at a workbench. Retrofitting these into a finished shed costs far more than choosing the right footprint and roof style on day one. A lean-to roof, for example, sheds water well but limits interior height on the low side, a detail that matters the moment you add a bench.
What Professional Shed Installation Costs and What You Get
Professional shed installation costs vary by region, foundation type, and shed size, so there's no single figure that applies everywhere. What you're paying for is labor, site prep, and the expertise to avoid the failures covered above.
The breakdown typically covers:
- Site assessment and base preparation
- Foundation installation and leveling
- Panel and frame assembly
- Roof, door, and window fitting
- Final inspection and cleanup
What you get in return is a shed that sits level, drains properly, and holds up through the seasons. For homeowners who've already dealt with a warped floor or a door that won't close, that's worth more than the labor savings.
At Home Outpost Supply, every order is tracked and insured, and our team offers dedicated assistance before and after purchase so you're not left guessing once the crate arrives.
Conclusion
Getting a shed right the first time saves you from redoing the foundation, reapplying for permits, or replacing panels two years in. Home Outpost Supply carries durable storage sheds built for real weather, with insured shipping, secure payment processing, and a support team that stays with you from order to install. Browse our shed selection and add to cart with confidence.
Frequently Asked Questions
Is it worth paying for professional shed installation?
It usually is, especially for sheds 10x12 or larger. Professional shed installation handles ground leveling, foundation type, and anchoring, which are the three things that most often cause DIY sheds to lean, leak, or rot early. If your yard slopes or your shed sits on a concrete slab or gravel base, the labor cost is often less than repairing a failed foundation later. Smaller 6x8 kits on flat ground are more forgiving if you want to assemble them yourself.
What are the risks of an improperly leveled shed?
An unlevel shed twists the frame, which pulls door and window openings out of square. Doors stop latching, roof panels separate at the seams, and water pools where it should drain. Over a season or two, that shows up as rust along the base, soft spots in a wood floor, and gaps that let mice and moisture in. Leveling is the single step that decides whether your shed lasts five years or twenty.
Do I need a permit for a backyard shed installation?
It depends on your local zoning ordinances and the shed's square footage. Many jurisdictions require backyard shed building permits once a structure passes a threshold, often 100 to 200 square feet, and nearly all enforce setback requirements from property lines. HOA rules can be stricter than the city. Check with your local building department before you pour a slab or set a foundation, because moving a shed after it is anchored is far more expensive than filing paperwork first.
How long does professional shed installation typically take?
A small resin or metal shed on a prepared base can go up in a few hours with a two-person crew. Larger 13x20 or 20x13 metal sheds with double doors often take a full day, and anything requiring a poured concrete slab adds curing time before assembly starts. Site preparation, ground leveling, and anchoring usually account for as much time as the assembly itself, which is why DIY builds stretch across multiple weekends.
The decision between assembling a kit yourself and hiring a crew comes down to how much risk you're willing to absorb. Home Outpost Supply offers durable, weather-resistant sheds backed by insured shipping and dedicated support before and after purchase. Get started with Home Outpost Supply and give your backyard the storage solution that lasts.


Leave a comment
This site is protected by hCaptcha and the hCaptcha Privacy Policy and Terms of Service apply.