

Best Shed Foundation for Uneven Ground (2026 Guide)
Table of Contents
- Why a Standard Foundation Fails on Uneven Ground
- Compare the Best Shed Foundation Options for Uneven Ground
- How to Assess Your Site Before Choosing a Foundation
- Best Shed Foundation on Slope: A Step-by-Step Build
- Leveling Ground for Shed: The Preparation Process
- When to Choose a Concrete Pier Shed Foundation
- DIY vs. Professional Installation
- Frequently Asked Questions
Last Updated: September 8, 2026
Why a Standard Foundation Fails on Uneven Ground
The best shed foundation for uneven ground is not a concrete slab poured flat, but a system that transfers load to stable soil while managing water runoff. A standard pre-built foundation kit or simple gravel pad on a slope without proper preparation settles unevenly over time, causing doors to bind, wall panels to separate, and the roof to rack. A shed foundation is only as good as the ground beneath it, and sloped sites demand a different engineering approach than flat ones.
Most homeowners discover this the hard way: they level the top few inches of soil, drop in a shed, and within two seasons the rear corner sinks. The culprit is usually un-compacted fill or a failure to account for downhill water movement. The pattern is consistent: the ground, not the shed, determines how long the structure lasts.
The fix starts with understanding that a slope is three separate problems: soil bearing capacity, water drainage, and frost heave. Each affects your foundation choice differently, and every one has a straightforward solution provided you diagnose your site first.
Compare the Best Shed Foundation Options for Uneven Ground
No single foundation type wins for every sloped site. The right choice depends on how steep the slope is, what your soil is like, and whether you plan to move the shed later. Here is how the three main options stack up.
| Foundation Type | Best For | Slope Limit | Drainage Handling | DIY Difficulty |
|---|---|---|---|---|
| Concrete Slab | Permanent, heavy sheds | Under 5% grade | Requires forms and sub-base | High |
| Gravel and Crushed Stone Pad | Most residential sites | Up to 10% with terracing | Excellent, natural | Medium |
| Wooden Skid Foundation | Portable or temporary sheds | Up to 15% with piers | Good, keeps shed elevated | Low |
Concrete Slab
A reinforced concrete slab is the most permanent shed foundation and the most expensive to correct if you get it wrong. For a sloped site, the slab must be formed with a stepped or terraced edge so the concrete remains a consistent thickness rather than feathering out at the downhill side. It also requires a compacted sub-base of crushed stone beneath it, which means excavation work on the uphill side to create a level pad.
The advantage of a slab is that it distributes the shed's weight evenly and provides a finished floor that never shifts. The downside is that it is unforgiving: if the ground settles after the pour, you cannot easily lift a slab to add support. Ensure the slab surface slopes slightly for drainage, typically 1/8 inch per foot, so water does not pool under the shed.
Gravel and Crushed Stone Pad
A gravel and crushed stone pad is the most versatile option for uneven ground because it handles drainage naturally. Excavate the topsoil, lay landscape fabric, and build up layers of crushed stone, tamping each layer. On a slope, terrace the pad into the hillside so the top surface is level, with the downhill edge held in place by a retaining wall or heavy timber edging.
This foundation type excels in wet climates because water drains through the aggregate rather than pooling against the shed base. It also gives you a forgiving surface: if a low spot develops, you add more stone and re-tamp rather than tearing out concrete. The main limitation is that a gravel pad alone does not anchor the shed against high winds, so you may need ground anchors or tie-downs in exposed locations.
Wooden Skid Foundation
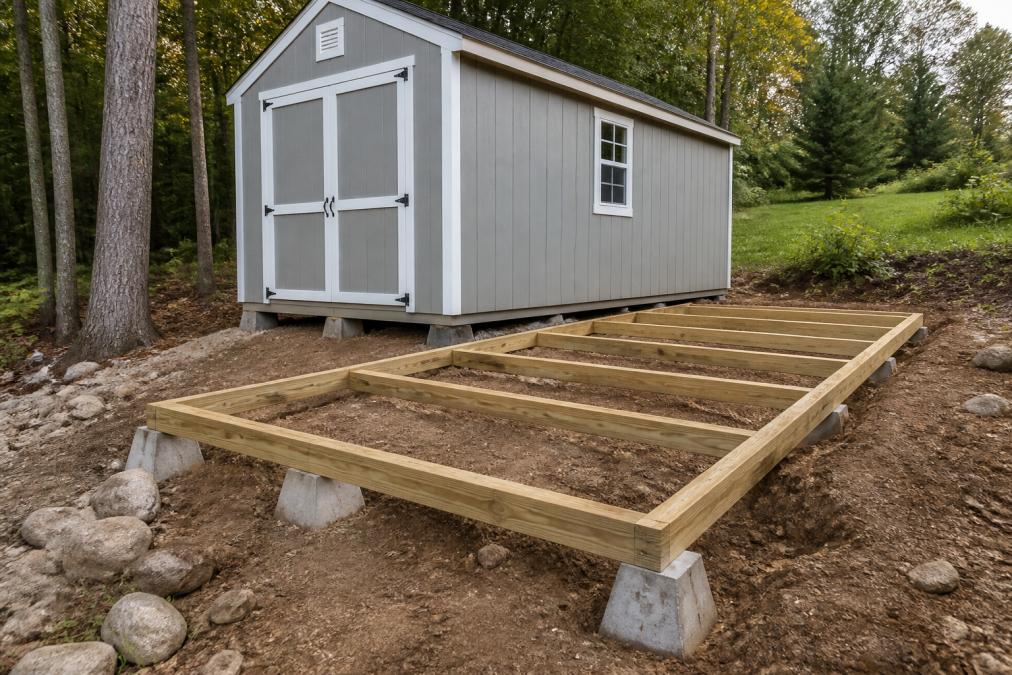
A wooden skid foundation uses pressure-treated lumber beams laid directly on the ground or on pier blocks to support the shed. This is the best shed foundation for uneven ground when you want the ability to move the shed later or when the slope is moderate. Skids run perpendicular to the slope, and you level them by adjusting the depth of gravel pads or using adjustable pier blocks at each corner.
Skid foundations keep the shed elevated above the soil, protecting the floor from moisture and making it harder for pests to nest underneath. They are also the easiest option for a DIY builder because they require no concrete work. The trade-off is a shorter lifespan than a slab if the lumber touches the ground, so always use pressure-treated lumber rated for ground contact and keep the skids at least a few inches above the soil where possible.
How to Assess Your Site Before Choosing a Foundation
Before buying materials, spend an afternoon diagnosing your site. The assessment takes about an hour and will save you from choosing a foundation that fails within a few seasons. Answer three questions: what is your soil like, how steep is the slope, and where does water go when it rains?
Soil Type and Drainage
Soil type determines how well your foundation will hold. Clay soils expand and contract with moisture, shifting a foundation over time. Sandy or loamy soils drain well but may lack bearing capacity for a heavy shed without compaction. Dig a hole about 12 inches deep, fill it with water, and time how long it takes to drain. If water is still standing after several hours, address the drainage before installing any foundation.
For problem soils, a geotechnical soil test is worth the cost. A local engineer can tell you the soil's bearing capacity and whether you need to over-excavate and replace poor soil with compacted aggregate. Many homeowners skip this step, but it is the single most reliable way to avoid a sinking shed foundation.
Slope Severity and Frost Line
Slope severity dictates which foundation type is practical. A gentle slope of less than 5 percent can usually be handled with a gravel pad thicker on the downhill side. A moderate slope of 5 to 10 percent typically requires terracing or a stepped foundation. Anything steeper than 10 percent calls for pier foundations or engineered retaining walls, and you should consult a professional.
The frost line matters because foundations in cold climates must sit below the frost depth to prevent heaving. In northern states, that can mean digging 42 to 48 inches deep for concrete piers. Check local building codes for frost depth, since this varies widely even within a single state. A foundation that ignores frost heave will shift upward in winter and settle unevenly in spring.
Best Shed Foundation on Slope: A Step-by-Step Build
For a moderate slope, a terraced gravel pad with a wooden skid foundation is the most practical DIY approach. This method handles drainage, distributes the shed's weight, and keeps the structure elevated. Here is the step-by-step process.
Step 1: Mark and excavate. Lay out the shed footprint plus a 12-inch border on all sides. Excavate the uphill side so you create a level bench cut into the slope. Remove all topsoil and organic material down to mineral soil or hardpan.
Step 2: Install landscape fabric. Line the entire excavated area with landscape fabric to prevent weeds and to keep the gravel from migrating into the soil below.
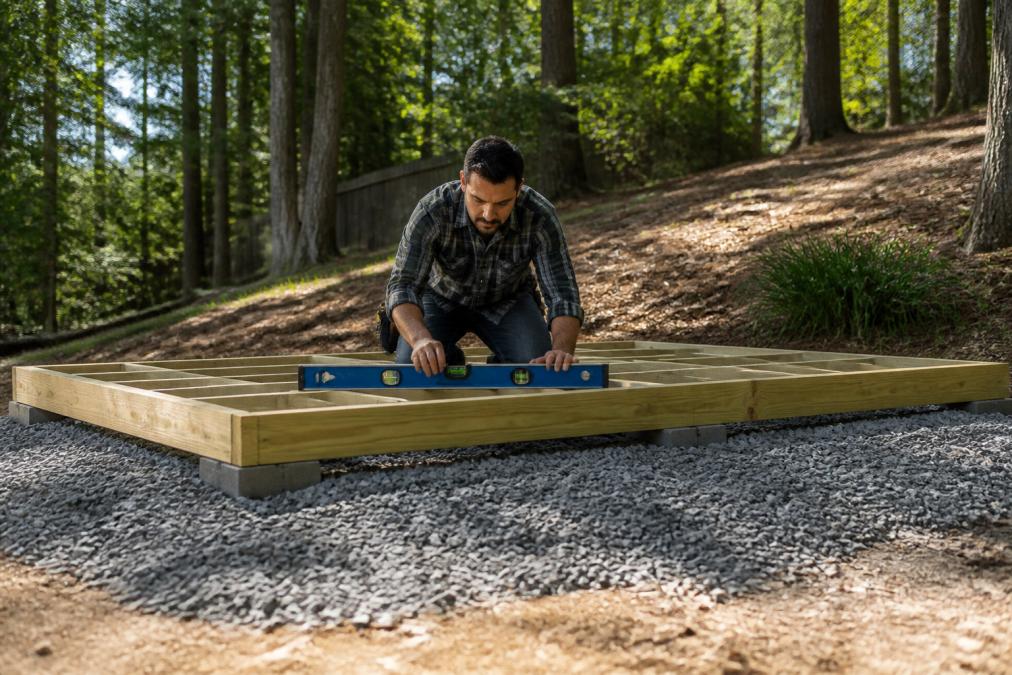
Step 3: Build up and compact the gravel base. Add crushed stone in 4-inch lifts, tamping each layer thoroughly with a hand tamper or plate compactor. The downhill edge will be thicker than the uphill edge. Continue until the gravel surface is level and extends a few inches above the surrounding grade.
Step 4: Set the skids. Lay pressure-treated 6x6 or 4x6 skids perpendicular to the slope on the gravel pad. Space them according to your shed's floor joist layout, typically 4 feet on center. Use a long level to verify the skids are level in both directions.
Step 5: Anchor and finish. Drive rebar through the skids into the gravel or use galvanized brackets to tie the skids together. Place the shed on top and secure it to the skids with lag bolts.
Leveling Ground for Shed: The Preparation Process
Leveling ground for a shed is not the same as making the surface look flat. Leveling means creating a stable, compacted platform that will not shift under load, and the preparation process is where most DIY projects go wrong.
The first mistake is adding fill soil on the downhill side and expecting it to stay put. Loose fill will settle, sometimes by several inches, and can wash out during heavy rain. Instead, cut into the slope on the uphill side and use the excavated material to create a level bench, giving you a platform on undisturbed soil rather than on fill.
The second mistake is skipping compaction. Excavated and replaced soil needs to be compacted in lifts, adding a few inches at a time and tamping each layer. A plate compactor is the right tool. Run it in overlapping passes until the surface no longer shows visible movement under the machine.
The third mistake is ignoring water runoff. A level pad is only half the solution; you also need to direct water away from the shed. Grade the surrounding soil so it slopes away from the foundation on all sides, and consider adding a French drain or swale on the uphill side to intercept runoff.
When to Choose a Concrete Pier Shed Foundation
A concrete pier shed foundation is the right choice when your slope is steep, your soil is unstable, or you need to clear the frost line. Piers transfer the shed's weight to deep, stable soil, bypassing problematic surface layers. They also elevate the shed, protecting it from moisture and making the underside accessible for inspection.
Pier foundations work well on slopes because each pier can be set to a different depth, allowing you to level the shed without a massive gravel pad. This makes them ideal for hillsides where terracing would be impractical or a retaining wall required. Piers are also the best option near trees, since the excavation is smaller and less likely to damage roots.
The main drawback is the labor. Digging pier holes to the frost line by hand is strenuous, and you typically need 6 to 12 piers depending on shed size. You also need to ensure the piers are aligned and level before the concrete sets, requiring careful layout and bracing. For most homeowners, this is the point where hiring a professional becomes worth the cost.
DIY vs. Professional Installation
The decision between DIY and professional installation comes down to site complexity and your tolerance for physical labor. A flat or gently sloping site with good drainage is a straightforward DIY project most homeowners can complete in a weekend. A steep slope, clay soil, or a large shed shifts the balance toward hiring a professional.
DIY is the better choice for a small to medium shed, a slope under 10 percent, and access to a plate compactor. The cost savings are significant, and the skills required, excavation, leveling, and basic carpentry, are within reach of most motivated homeowners. The main risk is underestimating the labor of moving and compacting gravel, which is genuinely hard work.
Professional installation makes sense when your site requires engineered retaining walls, deep pier foundations, or significant excavation. A structural engineer or experienced contractor can also spot problems you might miss, such as hidden drainage issues or soil needing special treatment. The cost is higher, but so is the certainty that the foundation will last as long as the shed.
Choosing the best shed foundation for uneven ground is about matching the foundation to your site, not picking the most popular option. Start with a thorough site assessment, then choose the foundation type that fits your slope, soil, and budget. Home Outpost Supply offers durable shed solutions with insured shipping and dedicated support before and after your purchase. Get started with Home Outpost Supply and build a shed that stays level for decades.
Frequently Asked Questions
What is the best way to build a shed base on uneven ground?
The best way is to use a gravel pad or concrete piers. For minor slopes, excavate the high side to create a level area, then lay landscape fabric and add 4-6 inches of crushed stone in layers, tamping each one. For steeper slopes, a concrete pier foundation with adjustable brackets is the most reliable method to achieve a level and structurally sound shed base.
Can I use concrete blocks for a shed foundation on uneven ground?
Yes, concrete blocks or pier blocks are a common and cost-effective solution, especially for slopes. However, they must be set on a stable base. Dig down to undisturbed soil or a compacted gravel pad below the frost line to prevent shifting. Use a string line and level to ensure all blocks are at the same height before placing your shed's skids or beams on top.
How deep should a gravel shed base be on a slope?
On a slope, you need a deeper gravel base to create a level surface and prevent washout. Plan for at least 4 to 6 inches of compacted crushed stone across the entire footprint. On the downhill side, you may need additional gravel to build up the grade. Always use landscape fabric beneath the gravel to separate it from the soil and prevent settling.
Do I need a permit for a shed foundation on uneven ground?
Permit requirements vary by local jurisdiction, but they are more likely for foundations involving excavation or concrete. Contact your local building department before starting. They will provide specific rules on frost depth, setbacks, and structural requirements. Building without a permit can lead to fines and issues when you sell your property.


Leave a comment
This site is protected by hCaptcha and the hCaptcha Privacy Policy and Terms of Service apply.