


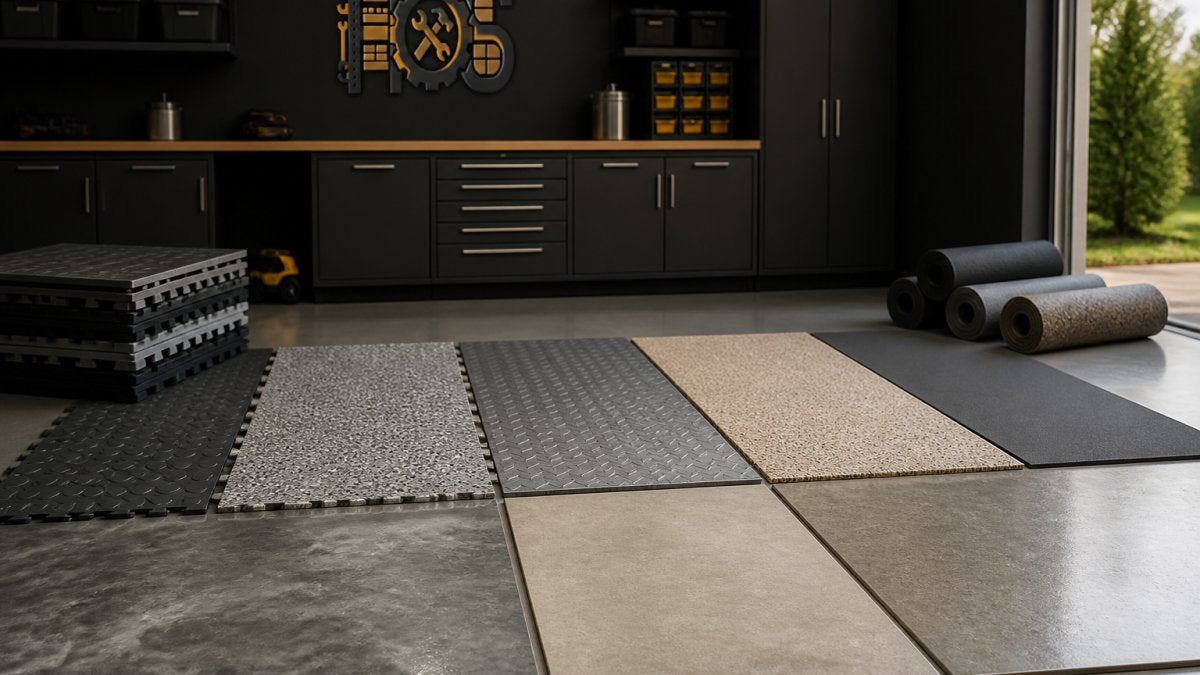
Best Garage Flooring Options for Home Workshops
Table of Contents
- Why Garage Flooring Matters for Your Workshop
- Epoxy Garage Floor Pros and Cons
- Garage Floor Tiles for Workshop Spaces
- Sealed and Acid-Washed Concrete Alternatives
- Rubber Flooring and Anti-Fatigue Mats
- Garage Floor Preparation and Installation Difficulty
- Garage Flooring Cost Comparison and Lifecycle Value
- Frequently Asked Questions
Last Updated: October 14, 2026
Why Garage Flooring Matters for Your Workshop
Your garage floor takes a beating: dropped tools, spills, heavy equipment. A bare concrete slab may seem fine at first, but without the right surface you're looking at cracks, stains, and slippery conditions that make your workshop harder to use and less safe.
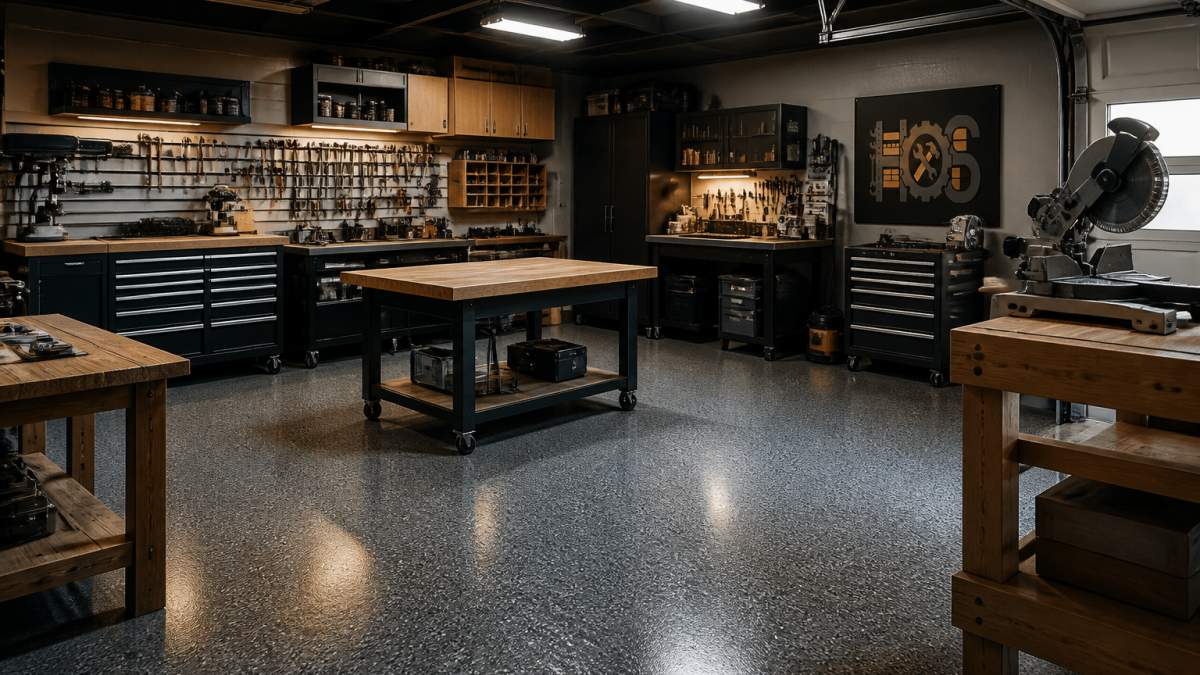
The right garage flooring options can transform your workspace: they protect concrete, reduce dust, ease cleanup, and hold up to regular use. Whether you run a woodworking shop, store vehicles, or juggle hobbies, your flooring choice affects how functional and safe the space becomes.
At Home Outpost Supply, we know a home workshop is an investment in your time and sanity. The garage flooring options you select determine whether it feels professional or chaotic, not just aesthetics, but durability, maintenance, safety, and performance under your specific demands.
Epoxy Garage Floor Pros and Cons
Epoxy coatings are the most popular choice for garage flooring options, and for good reason. An epoxy coating bonds directly to concrete, creating a hard, glossy surface that resists stains, chemicals, and impacts far better than bare concrete.
The advantages are substantial. Epoxy is easy to clean, spilled oil or grease wipes up without permanent marks, and resists moisture, keeping the concrete underneath from absorbing water and deteriorating. The high-gloss finish brightens the garage. DIY application is straightforward, though professional installation ensures better durability and appearance.
However, epoxy has real limitations. It becomes slippery when wet, which matters if rain or snow brings moisture in. It can chip or peel if the concrete isn't properly prepared or moisture exists beneath the surface, and repairs are often visible and patchy. Application requires careful prep, mistakes are hard to hide, and strong fumes demand good ventilation.
A common mistake is assuming epoxy will fix concrete moisture problems. If your concrete has rising damp or high moisture content, epoxy will fail, it will bubble and peel because the moisture pushes from underneath. Test your concrete first. In damp garages, sealed concrete or other options often work better than epoxy.
Garage Floor Tiles for Workshop Spaces
Interlocking tiles and modular floor systems offer flexibility that other garage flooring options don't. These tiles lock together and sit on top of your existing concrete, so installation is as simple as laying them down. No special tools, no chemicals, no waiting for coatings to cure.
The real advantage is repairability: damage one tile and you replace just that tile, while epoxy or sealed concrete requires refinishing the entire floor. Modular tiles also cushion your feet during long hours at a workbench, are safer than slick epoxy when wet, and many have perforated or drainage patterns that prevent puddles.
The trade-off is durability and appearance. Tiles can shift or settle unevenly, heavy equipment can crack or separate them, and seams trap dust and debris. They cost more per square foot than epoxy or sealed concrete and suit garages with heavy rolling machinery less well.
Installation is minimal, the easiest garage flooring option to DIY. No surface prep, curing time, or fumes, so you can use your workshop immediately.
Sealed and Acid-Washed Concrete Alternatives
If you want to keep your existing concrete but improve it, sealing or acid-washing offers a middle ground between bare concrete and full coatings.
Sealed concrete applies a transparent protective layer that penetrates the surface; acid-washing etches the concrete to open its pores, then applies a sealer. Both protect against stains and moisture while keeping the industrial look of bare concrete, and both are cheaper and easier to apply than epoxy, with less surface preparation.
The limitations matter. Sealed concrete is less durable than epoxy, typically lasting 2-3 years before resealing, and offers minimal slip resistance when wet. The protection is thinner, so stains can penetrate if liquid sits, and it doesn't hide existing damage or discoloration, only guards against future staining.
This works best in dry garages where you want a low-cost way to extend concrete life, and your slab is already in good condition.
Rubber Flooring and Anti-Fatigue Mats
Rubber and foam are the only garage flooring options that prioritize your body over your concrete, a distinction that matters more in a woodworking shop, where you stand at a bench for hours, than in a garage that just parks cars.
The anti-fatigue case is well established. Standing on a hard slab all day concentrates pressure on your feet, knees, and lower back. A 3/8-inch to 3/4-inch rubber or closed-cell foam mat spreads that load and encourages postural shifts that keep circulation moving, Where rubber gets interesting for woodworking is the trade-off nobody talks about: cushioning versus machine stability. A soft mat under a band saw, drill press, or router table lets the machine rock slightly as it vibrates.
Rubber also handles the two things woodworking throws at a floor: sawdust and dropped tools. Its texture grips fine dust instead of letting it skate across a slick surface, reducing the slip hazard around a table saw or miter station, and it absorbs the impact when a chisel or mallet slips off the bench, a small but real saving over a shop's lifetime.
Vibration is the flip side. Rubber dampens some machine vibration and noise, welcome with neighbors or a shared wall, but it redirects rather than eliminates it. If you run a planer or jointer on a rubber pad, check its level and fasteners more often, since the pad can mask the small movements that signal a loosening bolt.
Astro Series 96 in. W x 79 in. H x 20 in. D Garage Cabinet Set B →
Limitations to plan around:
- UV degradation. Rubber and foam break down under direct sunlight. If your garage has south- or west-facing windows, expect the mat to harden, crack, and crumble along the exposed edge within a few years. Roll it up or move it out of the sun when not in use.
- No concrete protection. Rubber sits on top of the slab and does nothing to stop moisture, staining, or surface wear underneath. If your concrete is already spalling or damp, fix that first.
- Compression under load. Park a vehicle or drop a heavy machine on a foam mat and it will compress permanently. Mats belong in the work zone, not under the daily driver.
- Edge curling and trip hazards. Rolled rubber and foam mats curl at the edges over time. A curled edge is a trip hazard in a shop full of sharp tools. Adhesive-backed edge strips or a beveled transition ramp solve this cheaply.
For slip resistance, rubber is the strongest option in the wet or dusty conditions a workshop actually sees. A wet epoxy floor is genuinely dangerous; a wet rubber mat is not. If your garage takes in snow melt or you use water stones and finishing oils, that's a safety feature, not a comfort feature.
The practical setup for most home woodworking shops: a hard, cleanable floor, sealed concrete, epoxy, or tiles, with rubber or foam mats only where you stand. You get durability and machine stability plus comfort and slip resistance exactly where your body needs it, without covering square footage you never stand on.
Garage Floor Preparation and Installation Difficulty
The surface you choose is only as good as the concrete underneath. Proper preparation determines whether your flooring lasts years or fails within months.
Concrete surface preparation involves cleaning, grinding, and sometimes patching, removing dirt, oil, grease, and loose concrete. For epoxy this is critical, since it won't bond to dirty or slick surfaces; acid-washing helps, but grinding is often necessary. Sealed concrete needs less aggressive prep, but the surface must still be clean.
DIY difficulty varies widely. Sealed concrete and tiles are straightforward for most homeowners. Epoxy is trickier: exact mixing ratios, even application, and a controlled curing environment, with mistakes that are visible and hard to fix. Polyaspartic coatings cure faster but cost more and require careful application.
Professional installation costs more upfront but delivers better results and longer durability. If your concrete has moisture problems or uneven surfaces, professional assessment is worth it, pros catch issues DIY prep misses.
Garage Flooring Cost Comparison and Lifecycle Value
Most garage flooring guides quote an upfront price per square foot and stop there, nearly useless for a workshop decision, because the floor you install is not the floor you pay for. What you actually pay is material plus preparation plus installation plus maintenance plus replacement, spread across the years you own the space.
Here's how the major options compare on a 400-square-foot single-car workshop, using typical contractor and DIY ranges. Treat these as planning bands, not quotes, slab condition, region, and prep needs move the number.
Sealed concrete. Material runs roughly $0.30-$1.00 per square foot, or $120-$400. DIY application is realistic for a clean, dry slab. The catch is the reseal cycle: most sealers need reapplication every 2-3 years, so a decade means three to five reseals, cheap in material but each costing a weekend of downtime and prep.
Epoxy coating. A DIY kit runs about $1.00-$2.50 per square foot, or $400-$1,000. Professional installation with grinding and a primer pushes $3.00-$7.00 per square foot, or $1,200-$2,800. Preparation wrecks budgets: diamond grinding, crack repair, and moisture mitigation can add $1.00-$3.00 per square foot.
Interlocking tiles. Modular PVC or polypropylene tiles run about $2.00-$4.50 per square foot, or $800-$1,800, with no prep cost and no cure time. The lifecycle advantage is repairability: a damaged tile costs a few dollars to swap, while damaged epoxy means refinishing a whole area.
Rubber and foam mats. Anti-fatigue mats and rolled rubber run about $1.50-$4.00 per square foot, but are usually deployed as a zone, not a full floor. Covering a 6-by-8-foot workbench area costs roughly $70-$200.
The 10-year math. Divide total cost by years of service for annual cost of ownership. A $1,500 epoxy floor lasting 10 years costs $150 per year. A $300 sealer resealed four times over the decade costs $120 per year in materials plus four weekends of labor.
Two costs never show up in per-square-foot pricing but hit workshops hard: downtime and disposal. Epoxy needs 24-72 hours of cure before you can walk on it and up to a week before heavy loads, taking your workshop offline. Tiles go down in an afternoon. If your shop is how you earn or unwind, a day of downtime has a value the price tag ignores.
Frequently Asked Questions
What is the best flooring for a home garage workshop?
The best garage flooring depends on your specific needs. Epoxy coatings offer durability and chemical resistance. Interlocking tiles provide easy installation and removal. Rubber flooring suits workshops where you stand for long hours. For heavy equipment and machines, sealed concrete or polyaspartic coatings handle impact and weight better than standard concrete. Consider your budget, climate, and workshop activities when choosing.
Can you install garage flooring over cracked concrete?
Cracked concrete requires preparation before installing most garage flooring options. Epoxy and polyaspartic coatings need the slab sealed and cracks filled to prevent moisture wicking and coating failure. Interlocking tiles can sometimes bridge minor cracks, but large cracks may cause uneven surfaces and safety hazards. Acid-washing and sealing won't address structural damage. Assess crack severity and moisture levels before choosing your flooring type, moisture in the concrete slab is the leading cause of coating failure.
Is epoxy or tile better for a garage workshop?
Epoxy offers seamless coverage, excellent chemical resistance, and durability under heavy tools, but requires professional preparation and can be slippery when wet. Interlocking tiles are easier to install yourself, provide better traction, allow individual tile replacement, and offer cushioning for standing comfort. Tiles are simpler to repair, replace one damaged tile instead of recoating the entire floor. For DIY installation and flexibility, tiles win; for seamless durability, epoxy leads.
What garage flooring can support heavy tools and equipment?
Epoxy and polyaspartic coatings excel under heavy machinery and impact from dropped tools due to their rigid, non-porous surface. Sealed concrete handles weight well but chips and cracks under concentrated loads. High-density interlocking tiles designed for commercial use support heavy equipment while allowing slight flex. Rubber flooring absorbs impact but may degrade under sustained weight from stationary machinery. For the heaviest loads and woodworking equipment, epoxy or commercial-grade tiles with proper base preparation are most reliable.


Leave a comment
This site is protected by hCaptcha and the hCaptcha Privacy Policy and Terms of Service apply.